
Hello, my chic ladies! Nailing the perfect manicure is no small feat, especially when time isn't your best friend. Between juggling work, family life, and precious me-time, who has the luxury to spend hours to get that intricate nail art design just right?
But hey! What if I told you that you could sport impeccably eye-catching nail art designs in less time than it takes to watch your favourite sitcom? That's right. Today, we're all about quick, simple and, most importantly, gorgeous nail designs that can make every busy woman feel like a diva on the go. So, get ready to don your creative cap and let's dive right into the fabulous world of quick nail art!
Why Quick Nail Art Designs?
"If you're like me, a nail art enthusiast who is always on the go, you understand the struggle: wanting fabulous nails but having a tight schedule. And that's where quick nail art designs step in to save the day (and our nails)! There's something incredibly satisfying about adorning your fingertips with eye-catching designs. But does it always have to come at the cost of time? Absolutely not! Let's dive into why you should consider quick nail art designs.
Time-saving Benefits
-
Swift and Simple: Quick nail art designs allow for creativity within the most stringent time constraints. They are easy to follow and can be accomplished in a fraction of the time it would take to complete intricate designs. Plus, they often require fewer tools - some designs need only a nail polish and top coat. That means less preparation and cleaning up afterwards .
-
Suitable for Every Occasion: Have a party coming up? Or maybe a business meeting? Quick nail art designs are versatile. You can choose from a range of designs that best suit the occasion and mood—all in a snap. So, why not make a statement with your nails no matter the event?
-
A Skill You Can Improve Over Time: Like any other art form, regular practice can see you master the techniques. And since these are "quick" designs, you can fit practice sessions into your schedule with ease. Over time, you'll be able to produce stunning nail art more quickly and efficiently.
Stunning Results in Less Time
The beauty of quick nail art designs is that they prove 'less is more.' With simple strokes, dots, and shapes, you can create intricate-looking designs that are nothing short of stunning .
- Experiment with Colors: Quick designs give you the freedom to play around with different hues. From pastel colors to bright neons, quick nail art design is a chance to highlight your color palette.
- Focus on Impact: A well-executed, minimalistic design can often have more of an impact than a complicated one. Quick designs enable you to emphasize the elements you most want to shine.
Here's the takeaway: quick nail art designs are fabulous, practical, and you don't have to reserve hours in your day to enjoy them. So, next time your nails are craving for a dash of personality, consider quick nail art designs. Embrace a world of beauty that's all about speed, simplicity, and stunning results!
Quick Nail Art Techniques
With the rise of nail salons and trendy nail colors, nail art has become a stylish way to express ourselves. However, booking an appointment and sitting in a salon can take up a lot of time. If you're like me, you'd rather explore your creative side and get your hands-on (quite literally) to embellish your nails. In this section, we'll cover four quick nail art techniques that can be done right at home. So, with a cup of your favorite drink on the side, join me in this fun and exciting journey!
The Dotting Technique
Without a doubt, dotting is the most straightforward yet appealing nail art technique. This technique lays the foundation for other, more complex styles as well. Here's a step-by-step guide to perfect the dotting technique:
- Apply a base coat to protect your nails from staining.
- Choose two nail paints: one for the background and another for dots.
- Start by painting your nails with the base formula. Let it dry completely before you proceed.
- Use a toothpick, the tip of a pen, or a specialized dotting tool to create dots on your nails with the second color.
- Finally, apply a transparent, quick-dry topcoat to seal in your designs.
There you have it, the dotting technique - creating statement nails that are simple yet chic!

The Two-tone Technique
The two-tone technique brings you the joy of flaunting two of your favorite colors at once! This procedure is quite simple, yet leaves your nails looking ever-so-stylish. Here’s how to do it:
- Begin with a base coat to shield your nails from any damage.
- Choose strikingly contrasting colors or similar shades for a sober effect.
- Apply the lighter color as the bottom layer, covering your entire nail. Allow it to dry thoroughly.
- Apply the second, darker color halfway through your nails, creating a two-tone gradient effect.
- Seal it off with a quick-dry topcoat.
And voila, you have trendy two-tone nails!
The Scotch Tape Technique
If you desire clean, geometric designs but have shaky hands, I got you covered. The scotch tape technique helps you achieve razor-sharp patterns with minimal effort. Here's how:
- Apply a base coat as usual.
- Paint your nails with the base color of your choice and let them dry completely.
- Cut small pieces of scotch tape and stick them onto your nails in desired shapes or patterns.
- Paint over the tape with a contrasting color.
- Once it’s fairly dry, gently peel off the tape.
- Apply a topcoat to protect your amazing work.
Easy, isn't it? Your nails are now a canvas of sharp and edgy designs!

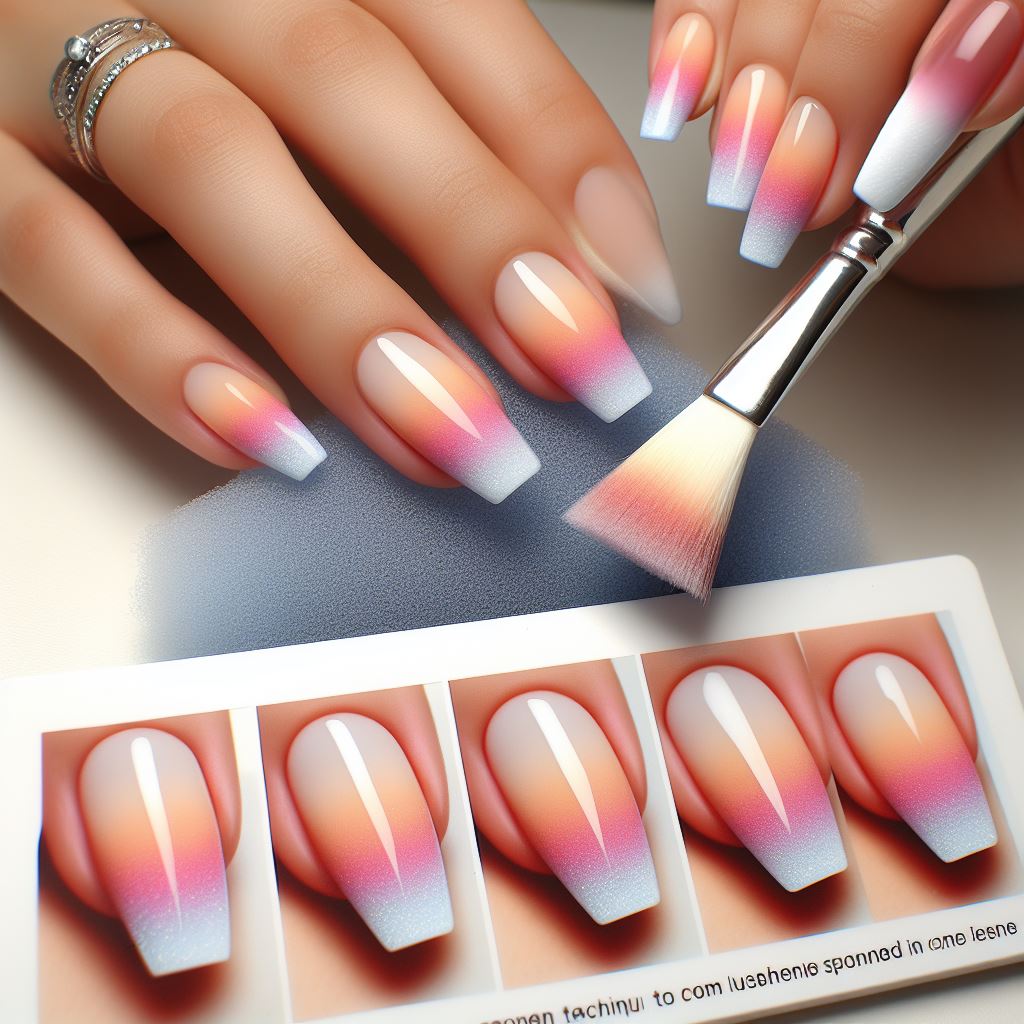
The Sponge Technique
Finally, if you want to recreate the mystic beauty of galaxies or the smooth blend of an evening sky on your nails, the sponge technique is here to help!
- As always, apply a protective base coat.
- Paint your nails with a dark base color—usually black or deep blue.
- Pour a few drops of various colored paints onto a piece of paper or foil.
- Dab a small piece of sponge into the paints and lightly press onto your nails.
- Repeat the process until you achieve the desired effect.
- Finish with a glittery topcoat for a starry effect and to extend the lifespan of your art.
There you go, a masterpiece at your fingertips!
These techniques are just the starting point to your nail art adventure. You would be surprised at the intricate designs you can create with just a little practice. And the best part? You don’t need professional supplies or training. Your creativity is the only limit!
Step-by-Step Guide on Quick Nail Art Designs
It's time to take your manicure to the next level! If you're like me and adore painting your nails but are tired of the same-old solid colors and simple French tips, then you're in the right spot. Get ready to enhance your creativity, with these easy-to-learn and quick nail art designs!
Basic Dot Design
Bring out the polka dots because it's time to make them the star! You'll find this design both cute and super easy. Here's how you can create this simple and appealing design:
- Apply your base color.
- Dip a dotting tool (or the end of a bobby pin if you don't have one) into a contrasting polish color.
- Gently dot it on your nail creating any pattern you fancy.
- Wait for your handiwork to dry before applying a layer of clear top coat for a long-lasting and shiny finish.
It's that easy! Precision is key, but remember, practice makes perfect.

Simple Two-tone Design
Why stick to one color when you can flaunt two at the same time? This modern design is simplicity at its finest:
- Choose two complementing nail colors.
- Apply one color as your base.
- After it dries, apply the second color from the middle to the tip of your nail.
- Top it off with a clear topcoat, and voila! Your two-tone design is complete!
Remember, contrasting colors make this design pop, so choosing the right pair is crucial.
Easy Scotch Tape Design
This method might sound unconventional, but trust me, it produces stunning designs with crisp, sharp lines.
- Paint your nails with a base color and let it dry entirely.
- Cut several pieces of scotch tape into shapes and stick them onto your nails.
- Paint over the tape with a second nail polish color.
- Remove the scotch tape while the polish is still wet.
- After drying, secure it with a topcoat, and you'll have a sophisticated design fit for a diva!

Basic Sponge Design
Do you admire those cool gradient nail designs? Well, you'd be surprised at how simple they are to create at home with an everyday item - a sponge!
- Apply a light base color and let it dry fully.
- Apply two or more colors to a sponge, ensuring they overlap slightly.
- Dab the sponge onto your nail, reapplying the colors when necessary.
- Wait for it to dry before sealing your work with a glossy topcoat.
Of course, cleaning up around the nails might be required, but trust me, the end result is worth it!
Advancing your nail art game truly doesn't require professional salon skills. Isn't it awesome how with a little creativity and some everyday items you can create unique and eye-catching designs? Now let your nails speak volumes about your personal style with these easy and quick nail art designs!
Simple Tips to Create Gorgeous Nail Art Designs in less time
Hello, nail art enthusiasts! Are you on a quest to bring out your inner creativity and create drop-dead gorgeous nail art designs without spending hours? Then you're at the right place. Today, we'll be exploring effective ways to express your individuality right at your fingertips, faster than ever before!
Choosing the right nail polish
The canvas for your nail art is the polish itself. Picking the quality colors play a massive role in how your designs look and last.
- High-quality nail polishes are friends forever. They go on smoother, prevent annoying chips, and extend the life of your flashy nail designs.
- Create a eye-catching balance by using colors that complement each other. Remember, contrasting colors stand out, while analogous colors create a more subtle effect.
- Use special effect polishes. These include metallic, matte, or glitter finishes that deliver a high-impact look in no time at all.

Using the right tools
A lot of us think we need to stock our drawers full of professional nail tools, but this isn't entirely true. A few key pieces can simplify your job immensely.
- Use a Dotting tool: These are like tiny paintbrushes for your nails. You can make dots, lines, or tiny details with ease.
- A fine brush can work wonders: These allow you to paint straight lines, create intricate details, or color in smaller areas.
- Makeup sponge for gradient: Yes, you heard that right. A simple makeup sponge can be an ultimate tool for creating gradient or ombre nail art designs.

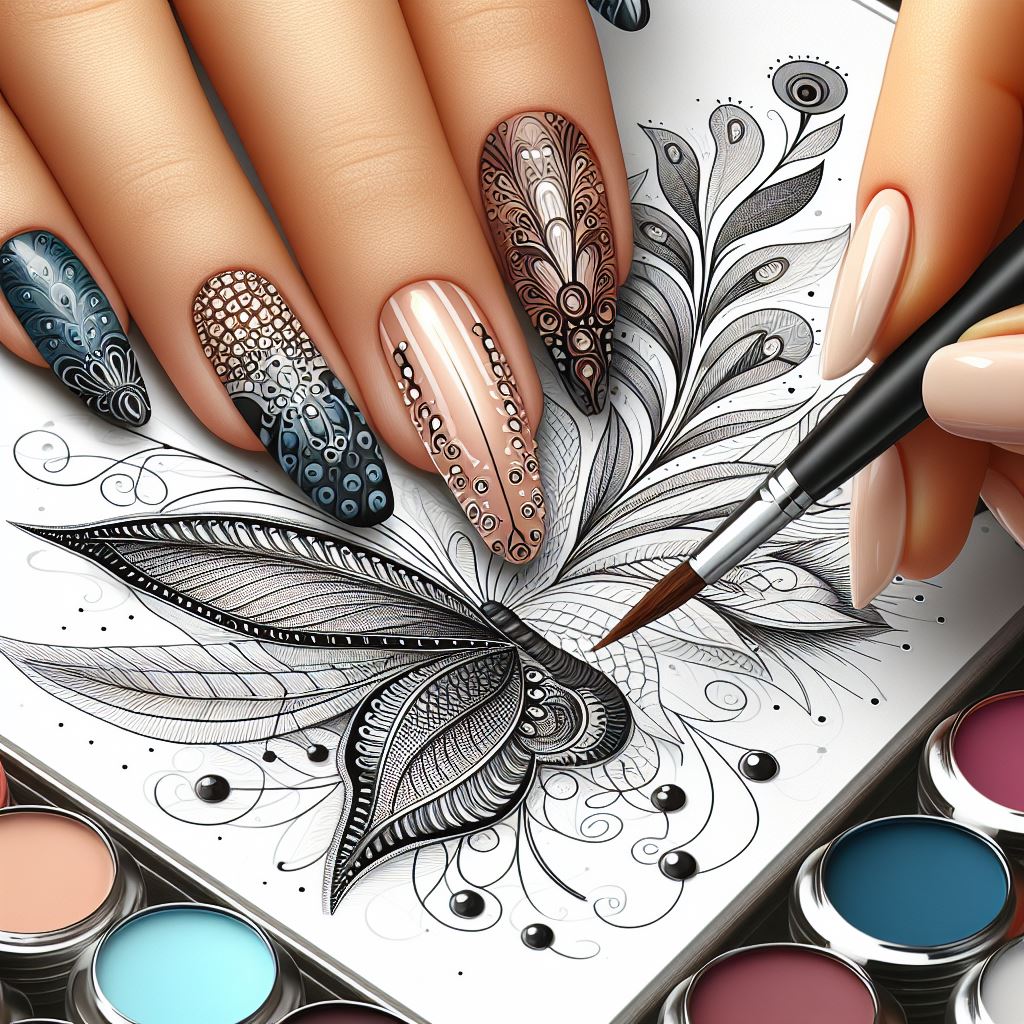
Being creative with designs
This is perhaps the best part about nail art, the endless possibilities that you can bring to life.
- Keep things simple. Simple nail designs can be just as appealing as complex designs. A few dots or stripes can transform a basic manicure into a work of art.
- Use unconventional methods. Ever tried creating designs using an old newspaper or plastic wrap? They can make for some truly unique and stunning effects.
- Be patient. Creativity thrives in patience. If a design doesn't come out exactly how you imagined, don't get discouraged. Try, try again – good things take time!
There you have it, some bonafide tips for creating gorgeous nail art designs efficiently! So what are you waiting for? Grab your polishes and tools, and let those creative juices flow!
Remember, it's not about being perfect, it's about expressing yourself and having fun in the process. Let's create magic!

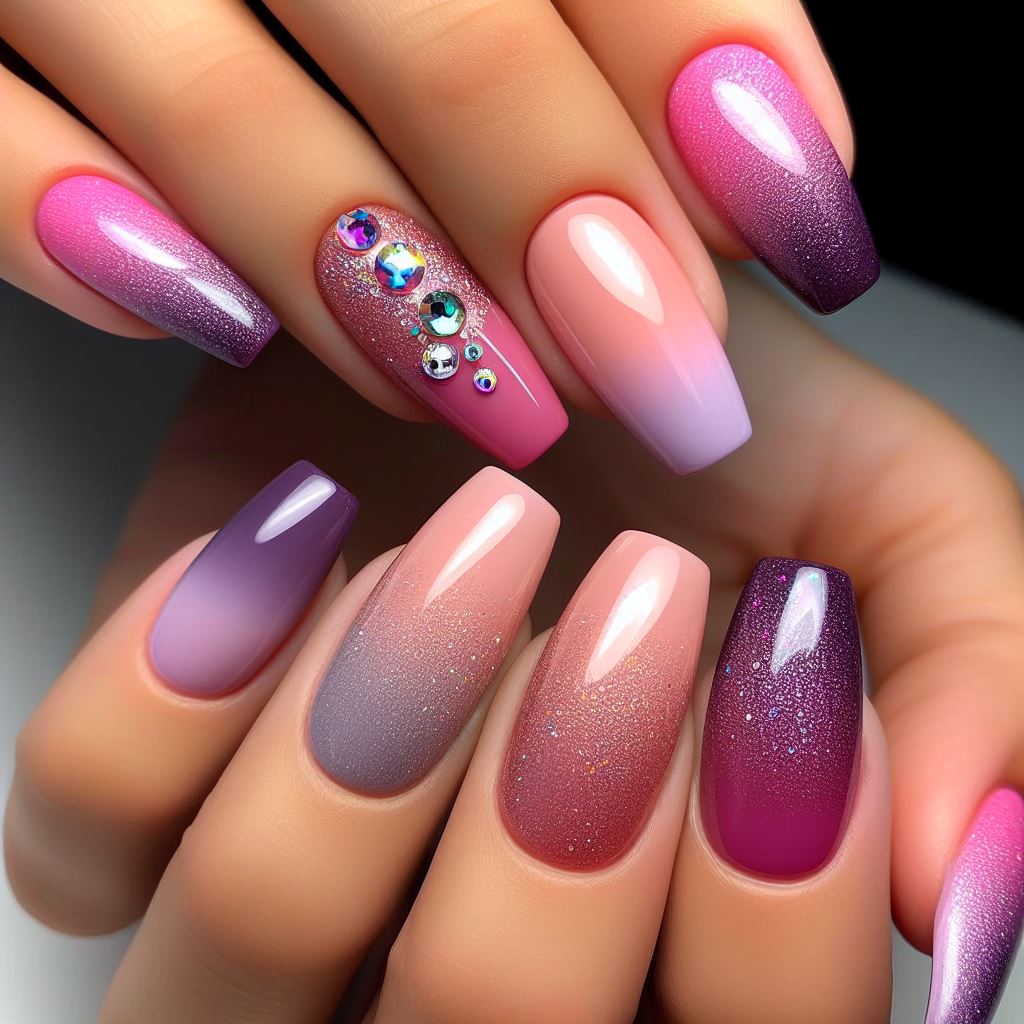
Nail Art Ideas for Busy Women
As a woman who is constantly on the go, I can understand how hard it can be to keep your manicure looking sharp. Whether you're rushing to meet work commitments, focusing on your family, or trying to squeeze in a social life, it can be a daunting task to maintain those pretty nails. But, ladies, never underestimate the power of a good manicure. It's not just about vanity; well-groomed nails can significantly lift your confidence and add a sprinkle of style to your persona. Now, I'm here to make your life easier with some nail art ideas, specially curated for busy women like us.
For Casual Outings
For casual outings, you want to wear something that looks chic yet comfortable. The same rule applies to your nails. Here are some terrific nail art ideas that you can easily pull off:
- Classic French Manicure: You can never go wrong with this one. It's simple, elegant, and absolutely perfect for a casual day out.
- Minimalist Lines: If you're all about subtle beauty, try this one. Just paint your nails with a nude polish and draw thin, straight lines (vertically or horizontally) on them. Voila!
- Pastel Polka Dots: Add a dash of fun to your nails with pastel polka dots. All you need is a toothpick to create those cute dots.
For Professional Settings
When it comes to professional settings, you need nail art that is sophisticated and not too flashy. Some ideas for you:
- Nude Ombre: This one is absolutely perfect for a work environment. It's stylish, subtle, and super cool.
- Geometric Patterns: If you love to experiment, give this one a try. Just make sure to choose colors that are not too bright.
For Special Occasions
Special occasions call for some extra glitz and glamour. Here are some nail art ideas designed to make you the life of the party:
- Shimmery Moonlight: This nail art involves painting your nails with a silver base color and adding some sparkly accents. Make your nails shine like the moonlight!
- Floral Fiesta: Creating small flower prints on your nails can give them a gorgeous, festive look.
Remember, you don't have to be a professional artist to create these nail art designs. All you need is a little patience, some creativity, and the right tools. Practice these designs, and soon, you'll be flaunting your stunning nails everywhere you go! Stay tuned for more nail art ideas tailor-made for busy women like us!

Conclusion
Though our lives may be busier than ever, who said we should compromise on glam? I say, no way! We've delved into the world of quick nail art techniques, explored a treasure trove of step-by-step designs, and shared some crucial tips to create stunning nails in a jiffy.
From bustling professionals to glam goddesses, we've got you covered with top-notch nail art ideas suitable for every setting. Whether you're stepping out for a casual outing, heading to an important professional meeting, or dolling up for a special occasion, simplicity and speed need not bore your nails.
Remember, ladies, your nails say a lot about you, and they deserve no less than the best! And though these techniques and DIY guides are here to make your life easier, we won't judge if you fancy a little pampering time with a nail expert.
If an extra pair of hands sounds tempting, why not unwind at my home-based salon and let me work my magic? At Nina Nailed It, I promise to deliver spectacular nails that are sure to turn heads, even on your busiest days! Ready for fabulous nails? Let's start dolling up!
Frequently Asked Questions
-
Can beginners try nail art designs for busy women?
Yes, nail art designs for busy women can be enjoyed by beginners as well. There are simple and quick designs that beginners can easily achieve, such as minimalistic patterns, simple geometric shapes, or accent nails with a pop of color.
-
What are some quick and easy nail art designs for busy women?
Some quick and easy nail art designs for busy women include: 1. French tips with a twist, 2. Negative space designs, 3. Polka dot nails, 4. Ombre nails, and 5. Glitter accent nails.
-
How can busy women make their nail art last longer?
Busy women can make their nail art last longer by applying a good base coat, using quality nail polish, applying thin layers, avoiding harsh chemicals, wearing gloves while doing household chores, and applying a top coat every few days to seal the design.
-
Are there any time-saving tips for doing nail art?
Yes, there are time-saving tips for doing nail art. Some tips include: 1. Prepping nails in advance, 2. Using nail stencils or stickers for quick designs, 3. Investing in quick-drying top coats, 4. Using fast-drying nail polish formulas, and 5. Planning and practicing designs beforehand.
-
Can I achieve gorgeous nail art designs without going to a salon?
Absolutely! Beautiful nail art designs can be achieved at home without going to a salon. With some practice, creativity, and the right tools, busy women can create stunning designs that rival salon manicures.