
Hello, fellow DIY enthusiasts! If you're like me, and love to unwind with a crafty project, then you'll enjoy this article all about DIY nail art designs to try out during a relaxing at-home spa day.
Didn't think you could achieve salon-quality nails from the comfort of your couch? Think again! Nail art is a creative, fun, and therapeutic outlet that can even feel a bit therapeutic. This article will guide you through everything you need to start a DIY nail project, from the materials you’ll need and space selection to various nail art techniques. You’ll also learn step-by-step tutorials on each design, followed by essential tips on maintaining your art.
But that's not all! We’ll also guide you on setting up a calming spa ambiance at home, because who says you can’t enjoy an indulgent spa experience inside your own four walls? Remember, it's all about pleasure, relaxation, and most importantly, having fun! So put on your fluffy robe, prepare a warm cup of herbal tea , and let's dive into the wonderful world of DIY nail art.
Nail art is much more than a casual hobby; it's a form of self-expression, a play of creativity, and a spark of fashion sense all combined into one. With a quirky design or an elegant pattern, your fingertips can steal the show at any gathering. But before you let the colors fly and start drawing on your "tiny canvases," there's a need to take a few initial steps. These preparatory actions are crucial in creating durable, beautiful, and neat nail art.
Gathering Necessary Materials
First, let's take a look at what you'll need to get started:
- A nail file: to shape your nails to your desired look.
- A base coat: to protect your nails and make your nail art last longer.
- Nail polishes: in your chosen colors for the design.
- Nail art brushes: for detailed work.
- A top coat: to seal in your design and add a glossy finish.
- Nail polish remover and cotton swabs: in case of any mishaps or cleaning up.
Having all of these items lined up on your work table can save you from scrambling halfway through your nail art session, keeping stress levels at a minimum. Phew!
Choosing the Right Workspace
Adequate workspace set-up can make the difference between the perfect manicure or a messy one. Here are some aspects to consider for your ideal nail art station:
- Adequate lighting: to see all the details clearly.
- A clean, flat surface: for keeping your materials and working with ease.
- A comfortable chair: because nobody wants a backache while doing their nails.
- Accessibility: have everything within your arm's length.
Remember, your workspace can be as simple or elaborate as you'd like, so long as it serves your needs. Comfort and convenience are key!
Prepare Your Nails
Now, onto the stars of the show- your nails! Preparing your nails adequately is paramount to achieving a good result. Here are some steps to follow:
- Remove any previous nail polish completely.
- Trim your nails to the desired length and shape them with your nail file.
- Clean your nails with mild, soap and water, ensuring there are no traces of oil or dirt.
- Apply a base coat. This step is essential as it protects your nails and allows your design to pop!
The journey to dazzling nails should always start with proper preparation. Doing so ensures that your nail art will be of quality and last longer, making your efforts all worth it. Getting ready to unleash the artist within you, one nail at a time... Let's do this!
Are you fascinated by the captivating, intricate designs on nails that you see all around? If so, you're not alone. As a nail art enthusiast, I too, was once in awe of those dazzling designs. But guess what? You don't necessarily need to take a professional course or visit the salon to have those pretty nails. With a little imagination and practice, you can create those stunning designs at home! Today, in this first section, let's talk about the magic you can create with some common household items, creativity, and patience.
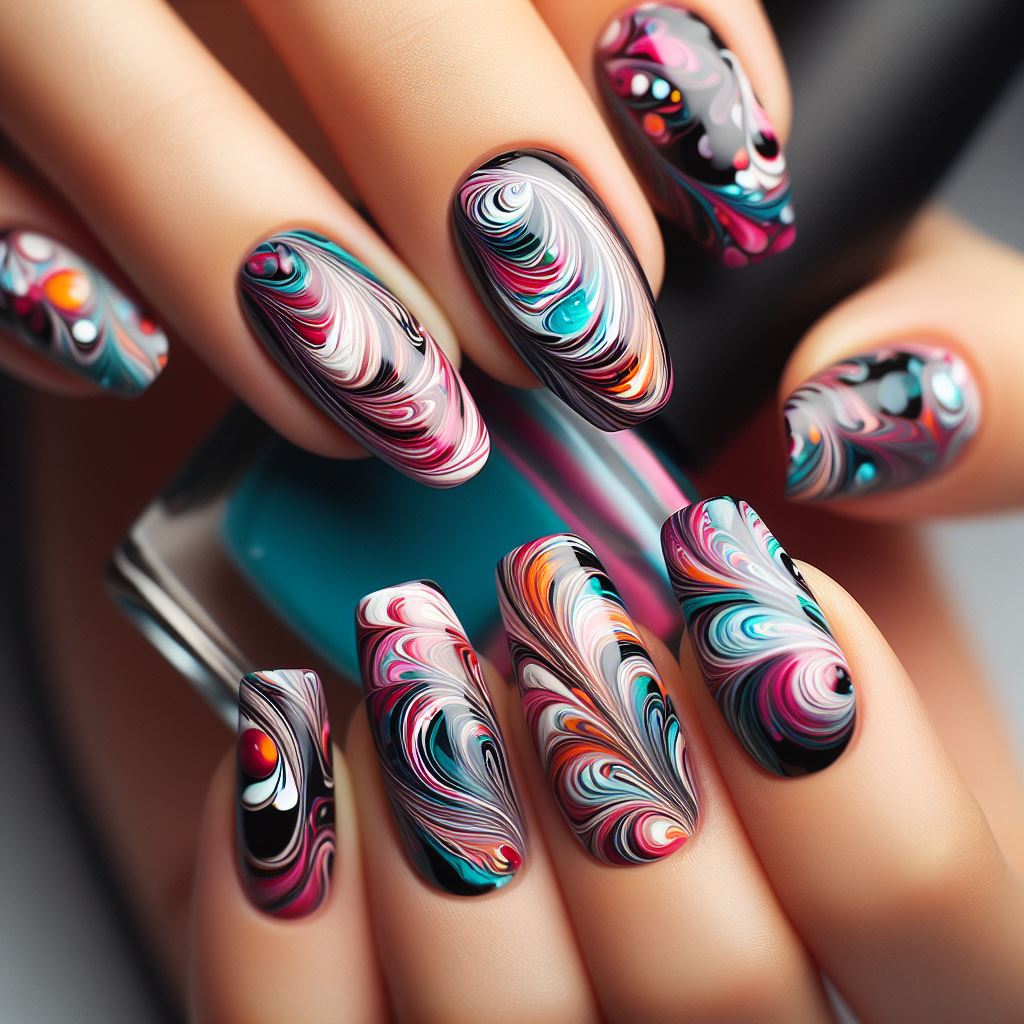
Marble Effect Nail Art
Have you ever admired the vibrancy and complexity of marble designs? You can replicate it on your nails, too! It's easier than you think. All you need are colored nail paints of your choice, a toothpick, and a cup of water.
- Add droplets of different nail paints into the water.
- Using a toothpick, create a swirl design.
- After immersing your nail into the design, clean up the excess paint around your nail.
Presto! You've made a marvelous marble effect nail design.
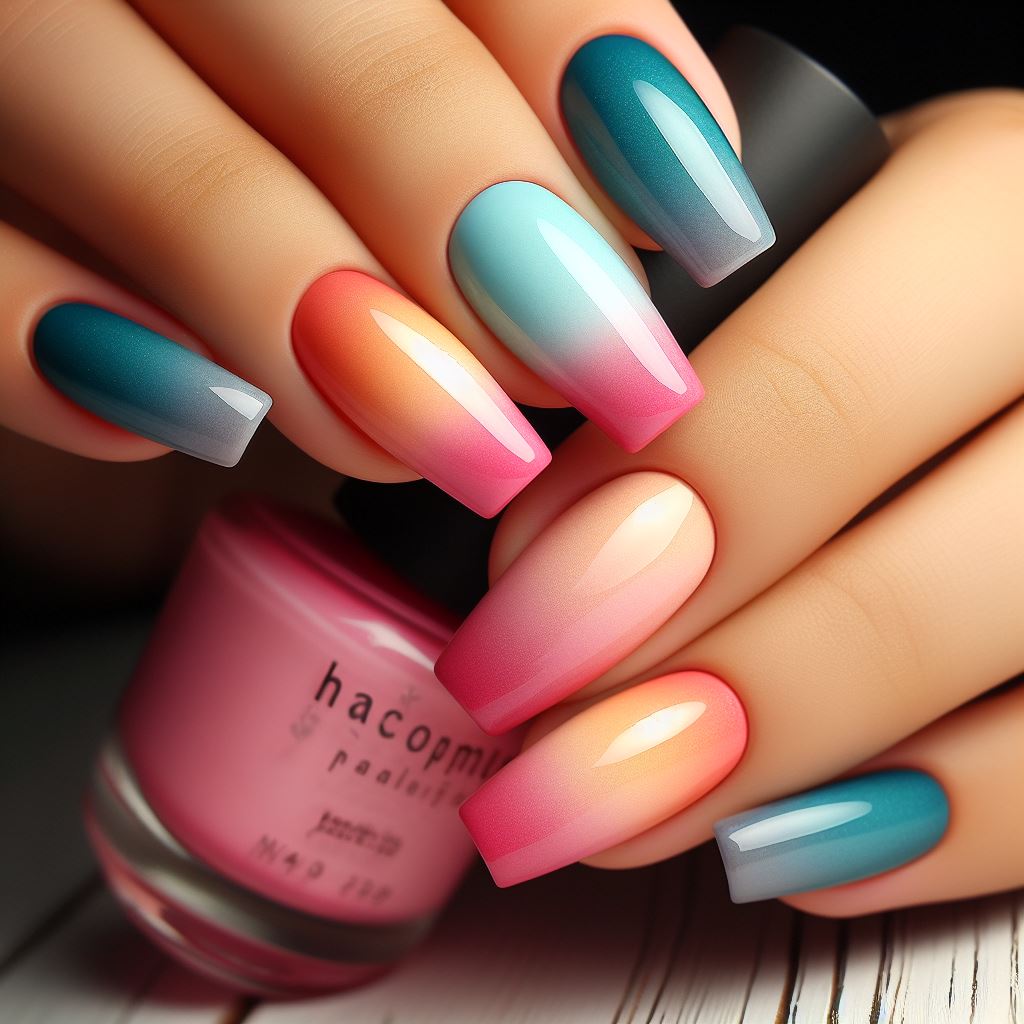
Ombre Nail Art
There's something incredibly appealing about color gradients, wouldn't you agree? The ombre effect is one such gradient style that has been in trend for years. Here are the steps to achieving that gorgeous gradient from the comfort of your home.
- Paint your nails with a light base coat.
- Load your sponge with two colors of your choice.
- Dab the sponge gently onto your nails, and reapply the colors if necessary.
Voila! You're now the proud artist of a beautiful ombre design.
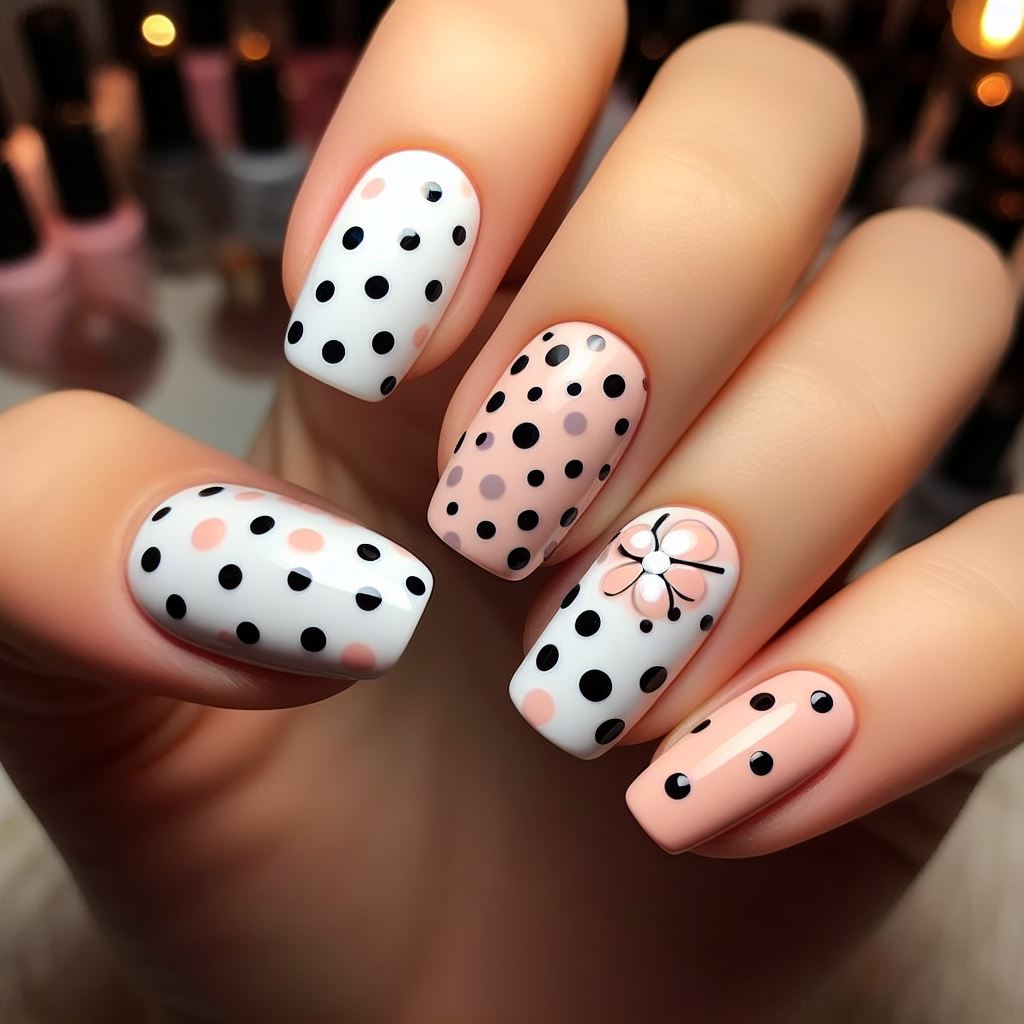
Polka Dots Nail Art
Polka dots, though classic, always manage to retain their charm.
- Start by adding a base coat of your choice.
- Dip the tip of a toothpick into nail paint and make dots on your nail.
- Complete the design by applying a clear top coat to secure the design.
Great! You've made a timeless polka dot design all on your own.
Striping Technique
The striping technique can create an array of magical designs and is a versatile tool to have in your nail art arsenal.
- After applying the base coat, use striping tape to create your desired pattern.
- Apply a different colored nail polish on top and smoothly remove the tape.
Tada! Your nails now boast a chic, striped design.

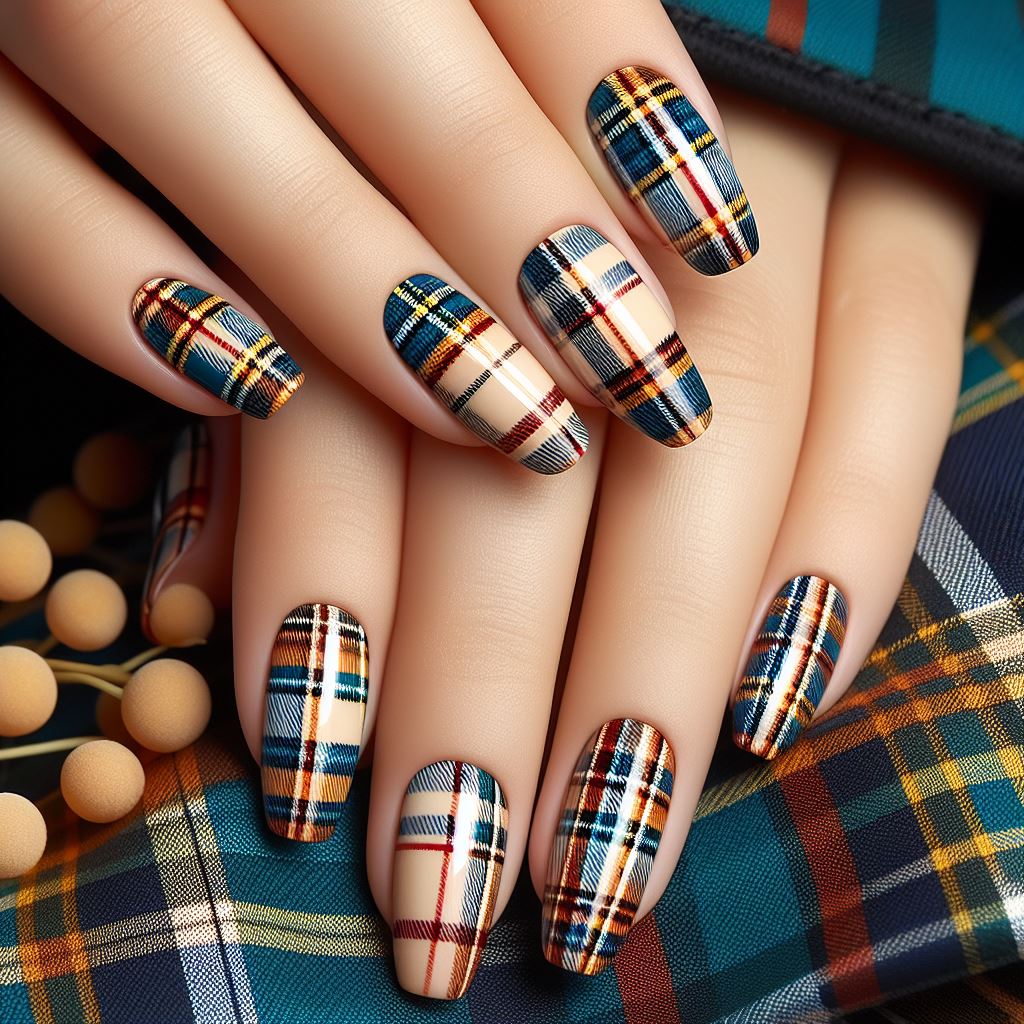
Madras Checks Nail Art
A Madras Check design brings a plaid, retro vibe that's both fun and engaging.
- Apply a base coat.
- Use a thin brush or striping tape to paint vertical and horizontal lines of varying widths and colors.
- Finish it off with a top coat to seal your design.
And done! You've not only created an attractive Madras checks design, but you also learned some fun DIY nail art techniques, which I'm sure you'll master in no time. Practice these techniques, experiment with different colors and patterns, and most importantly, have fun! Because the journey is just as fascinating as the end goal. So, grab your nail paints, and let's get started!
Delving into the world of nail art can be totally exciting yet a tad daunting at the same time. There is a plethora of designs, techniques, and styles out there that can turn your meek manicure into a mesmerizing masterpiece. But where should you start? To keep you from feeling overwhelmed, we've put together a step-by-step guide on how to master five popular nail art designs. Read on, and before you know it, your fingertips will become your favorite canvas for self-expression!
Guide for Marble Effect Nail Art
Marble Effect is like having miniature works of art at your fingertips. While it might seem complex, it's actually quite doable with a little patience and practice. Here's how you can create this effect:
- Start off by applying a good quality base coat to protect your nails. I typically recommend a strengthening base coat for overall nail health.
- Paint your nails white. It's not just a neat look on its own, but it's also a great canvas to start with a marble effect.
- Drizzle a few drops of different colored nail polishes into a bowl of water. They'll start forming concentric circles.
- Gently, use an orange stick to swirl these circles creating a marble effect.
- Dip your nails into this mesmerising mix, wait a few seconds, then remove and allow to dry.
- Finish off with a topcoat to seal in your piece of art!
Guide for Ombre Nail Art
The ombre effect's charm lies in its smooth, colour-transitioning appeal. Surprisingly easy to pull off, let's take you through it:
- Prep your nails with a base coat.
- Choose two complementary nail colors – let's say pink and white. Apply white to three-quarters of your nail from the base upwards. Keep the tips bare.
- On a smooth surface, apply your two chosen colors side by side. With a small sponge, dab it onto the polish and start dabbing onto the tips of your nails. Reapply on sponge and repeat dabbing until you receive the desired gradient.
- Apply a gloss top coat for the beautiful shiny finish and voila, you mastered ombre!
Guide for Polka Dots Nail Art
Polka dots are totally timeless! They add a vintage vibe and are adorable to boot. Here's how you can do it:
- Apply a base coat and let it dry.
- Choose a base color for your nails and let it dry completely before moving onto the next step.
- Choose a color for your dots. With a dotting tool, or the tip of a bobby pin, apply small dots over your nails in a pattern you desire. Allow drying.
- Seal it off with a top-coat, and you've got polka-perfect nails!
Guide for Striping Technique
Stripes can make a bold statement or capture the subtlest chic look. Here's how to achieve it:
- Apply a base coat to protect your nails.
- Paint your nails with a color of your choice.
- Once the base color is completely dry, apply thin striping tape in patterns you prefer.
- Paint over the tape with a contrasting color, and then quickly remove the tape before the polish dries.
- Finish with a topcoat to lock in your sassy stripes!
Guide for Madras Checks Nail Art
Madras checks are vivacious and deliver a fun, trendy summer look. Pulling this off is easier than you think:
- After applying a base coat, color your nails with a light base colour.
- Use a striping brush to paint vertical lines with a contrasting color. Let it dry.
- Repeat the process, but this time with horizontal lines, creating a checkered effect.
- With a dotting tool, add dots in the center of each square. Let it dry.
- Finish off with a topcoat, and you're summer ready with Madras checks!
I hope these step-by-step guides light your path to exploring and mastering the mesmerizing world of nail art. Now that you know these techniques, the world of nail designs is literally at your fingertips! Enjoy decorating your tiny canvases and express your style with every tap and gesture of your hands. Remember, practice makes perfect and in this case, nail practice makes for an eye-catching, statement-making manicure!
You've perfected your DIY nail art technique, but now comes the real challenge - how do you make it last? There's nothing more disheartening than watching your carefully crafted designs chip away just days or even hours after application. Fortunately, with the right tips and tricks, you can help your DIY nail art go the distance and stay looking fabulous for weeks on end.
Using Top Coats
The real secret to making your DIY nail art last is not what you put on your nails, but what you put OVER them. A good quality top coat can be the difference between nail art that chips in a day, and nail art that lasts for weeks. Here's why:
- Protection: A good top coat acts like an invisible shield, protecting the nail polish below from knocks, bumps, and the general wear and tear of daily life.
- Seals in the Colour: A top coat also serves to seal in your nail polish, preventing it from peeling or fading.
- Adds Shine: Not only does a top coat protect your designs, but it can also add shine, making your DIY nail art pop!
- Drying Time: A quick-dry top coat can help speed up the drying process, significantly reducing the risk of smudges.
So, don't be in a hurry to finish your manicure, remember to apply that layer of top coat. Unless you enjoy watching your hard work go down the drain.
Regular Nail Care
While that amazing top coat can do wonders for the longevity of your nail art, regular nail care is also essential if you want your designs to last as long as possible.
- Hydration: Keep your nails and cuticles hydrated by applying a moisturizer or nail oil regularly. This helps prevent cracking and peeling, which can damage your designs.
- Avoid Harsh Detergents: Prolonged exposure to harsh detergents can strip the natural oils from your nails and contribute to chipping and peeling. Consider donning gloves when doing dishes or cleaning.
- File Regularly: Keeping your nails filed and smooth can also help prevent chipping.
Remember, healthy nails equate to long-lasting nail art.
What to Do If Your Nail Art Chips
Slips and spills happen to everyone. If your nail art does chip, don't panic! Here are some tips to salvage the situation:
- Small Chips: For minor chips, gently buff the area to smooth it out, then apply a thin layer of top coat.
- Large Chips: If a significant portion of your nail art has chipped, you'll need to touch up with your colour polish before reapplying your top coat.
- Cracked/Crushed Nails: If your nail is cracked, you'll want to file it down to prevent further breakage, then reapply your nail art as best as you can.
While these misadventures aren't always avoidable, it's essential to know what to do when the inevitable happens.
Maintaining your DIY nail art doesn't have to be a tiresome task. With careful preparation, the right products, and a healthy dash of patience, you can rock those gorgeous designs for significantly longer. It's all part of mastering the art of the manicure – so experiment, learn, and above all else, have fun!
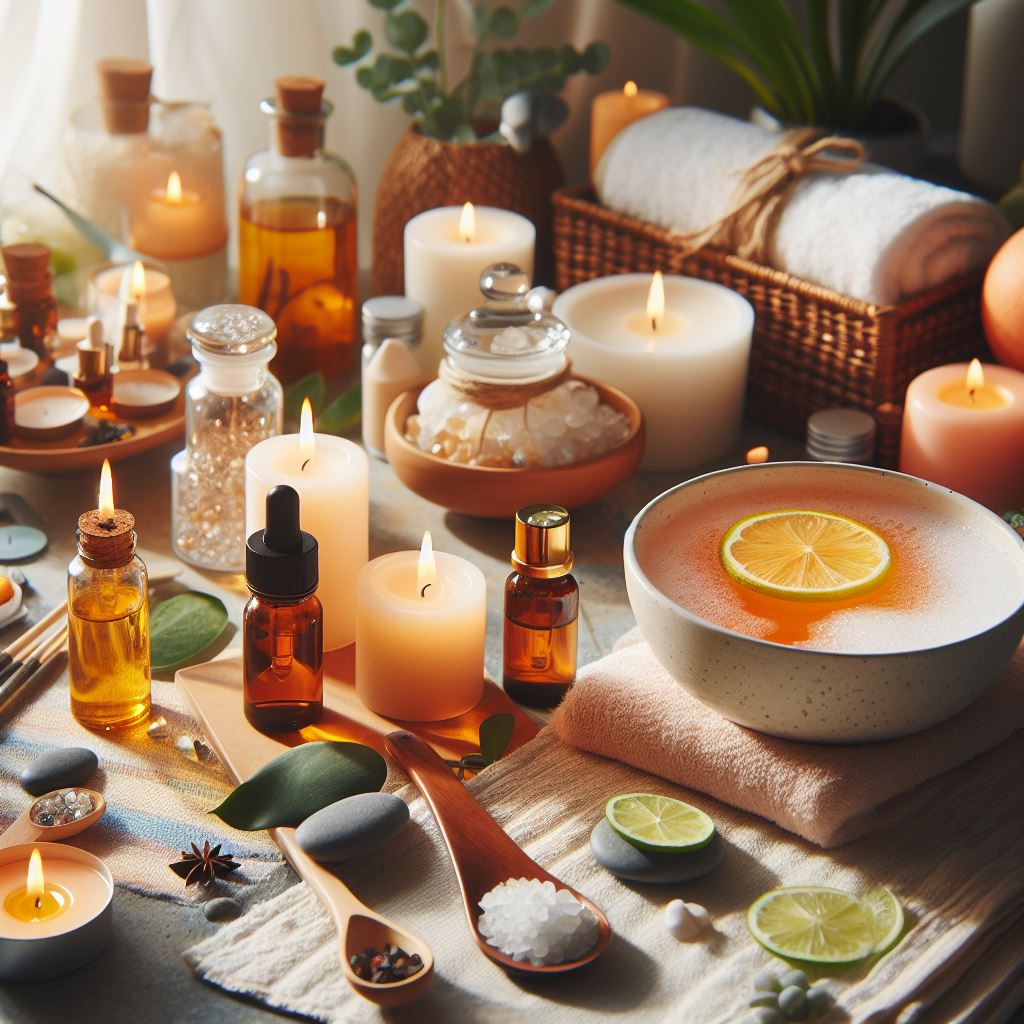
Step into the world of indulgence without stepping out of your home! You don't need a fancy spa retreat to enjoy a pampering session of nail art. All you need is the right ambiance, relaxing music, and refreshing snacks to bring the spa vibes to your personal space. Let's explore a few excellent ways to create your relaxing at-home spa ambiance for a fulfilling nail art session.
Lighting and Scent
The magic of a relaxing spa experience often starts with the right lighting and suitable aromas that get you in the right frame of mind.
To create a calming atmosphere, rely on gentle, warm lighting. Go for dimmable lights or opt for scented candles around your workspace. Not only do they provide soft illumination, but they also fill the air with calming fragrances.
Next, invigorate your senses with soothing scents. Try using essential oil diffusers with your favorite fragrances. Lavender , peppermint, and jasmine are popular choices known for their calming qualities. If essential oils are too strong for you, scented candles or incense sticks can be excellent alternatives.
Creating a Playlist
Music has the power to soothe, uplift, and heal, making it an integral part of your at-home spa experience. Before you begin your nail art session:
- Compile a playlist of your favorite soothing songs or instrumentals.
- Consider using streaming services that have pre-curated playlists suitable for meditation or relaxation.
- Alternatively, nature sounds, like a stream, a gusty forest, or chirping birds, are wonderful additions that transport you into a natural, serene setting.
Whichever you pick, let the harmonious blend of sounds create a peaceful backdrop to your nail art escape.
Refreshments
What's a spa day without delicious refreshments? Be it a cool cucumber-infused water , a tangy passionfruit mocktail, or a warm herbal tea , sipping on your favorite beverage is an intimate part of the experience.
Also, prepare a small snack plate with healthy nibbles. Think about refreshing fruits like watermelon or strawberries , nutritious nuts, or some delectable dark chocolate. The joys of savoring these treats during your nail art session add that extra touch of self-indulgence that making your at-home spa experience truly special.
Lighting, scent, music, and refreshments — all that's left is you immersing yourself in the DIY spa extravaganza. Embrace the tranquility, focus on your creativity, and most importantly, enjoy your nail art session to the fullest. Your cozy nest has everything you need for a perfect spa day; you just need to set the stage!
Conclusion
Phew! We did it, everyone! We have ventured together through the enthralling world of DIY nail art designs. These aren't just about adorning your nails, but more about exploring your creativity, rejuvenating your senses, and offering a rewarding and therapeutic experience right at the comfort of your home.
Remember, the beauty of DIY projects is that they're completely customizable. So, tweaks in techniques, experimentations with color combinations, and adjustments according to your unique style are the name of the game. It's all about producing something that you genuinely adore and that lifts your spirits!
In this journey, what's crucial is not perfection, but the fun-filled process. And trust me, with practice, you'll be a nail art expert in no time. Enjoy the oohs and ahhs as your friends admire your fancified fingers!
Lastly, don't forget to pair your nail art session with a relaxing at-home spa ambiance. The right lighting, soothing scents, a calming playlist, and some delicious refreshments could indeed transform an ordinary day into an exceptional one!
Whether it's a Marble Effect you're after, an Ombre look, playful Polka-Dots, sophisticated stripes, or the distinct Madras Checks Nail Art - just delve in, give it your all, and most importantly, have fun! Because that's what a truly relaxing at-home spa day is all about!
Here's to self-care, creativity, relaxation and fabulous nails!
Frequently Asked Questions
-
What are some easy nail art designs for beginners?
Some easy nail art designs for beginners include polka dots, stripes, ombre, floral patterns, and simple geometric shapes.
-
What tools do I need for DIY nail art at home?
For DIY nail art at home, you will need nail polish in various colors, a base coat and top coat, nail art brushes or dotting tools, nail tape, glitter or rhinestones, and a nail polish remover.
-
How can I make my nail art designs last longer?
To make your nail art designs last longer, apply a good quality base coat before painting your nails, ensure each layer of polish is dry before applying the next, add a top coat to seal the design, and avoid activities that may damage your nails.
-
Are there any nail art designs specifically for short nails?
Yes, there are several nail art designs that work well for short nails, such as French tips, simple accent nails with glitter or decals, negative space designs, or a basic two-tone manicure.
-
How can I remove DIY nail art without damaging my nails?
To remove DIY nail art without damaging your nails, soak a cotton ball in nail polish remover, place it on your nail and wrap it with foil. Leave it on for a few minutes, then gently push off the polish with an orangewood stick or a cuticle pusher.